
Showing posts with label gifts. Show all posts
Showing posts with label gifts. Show all posts
Thursday, February 1, 2024
Let the crafting begin . .


Wednesday, September 8, 2021
Tea Swap
Hello everyone! Just popping in to let you know we still have our monthly tea swap and 3x3 swap. Going strong 10+ years. If you are interested in joining us, send me an email and I'll invite you to the next open call.

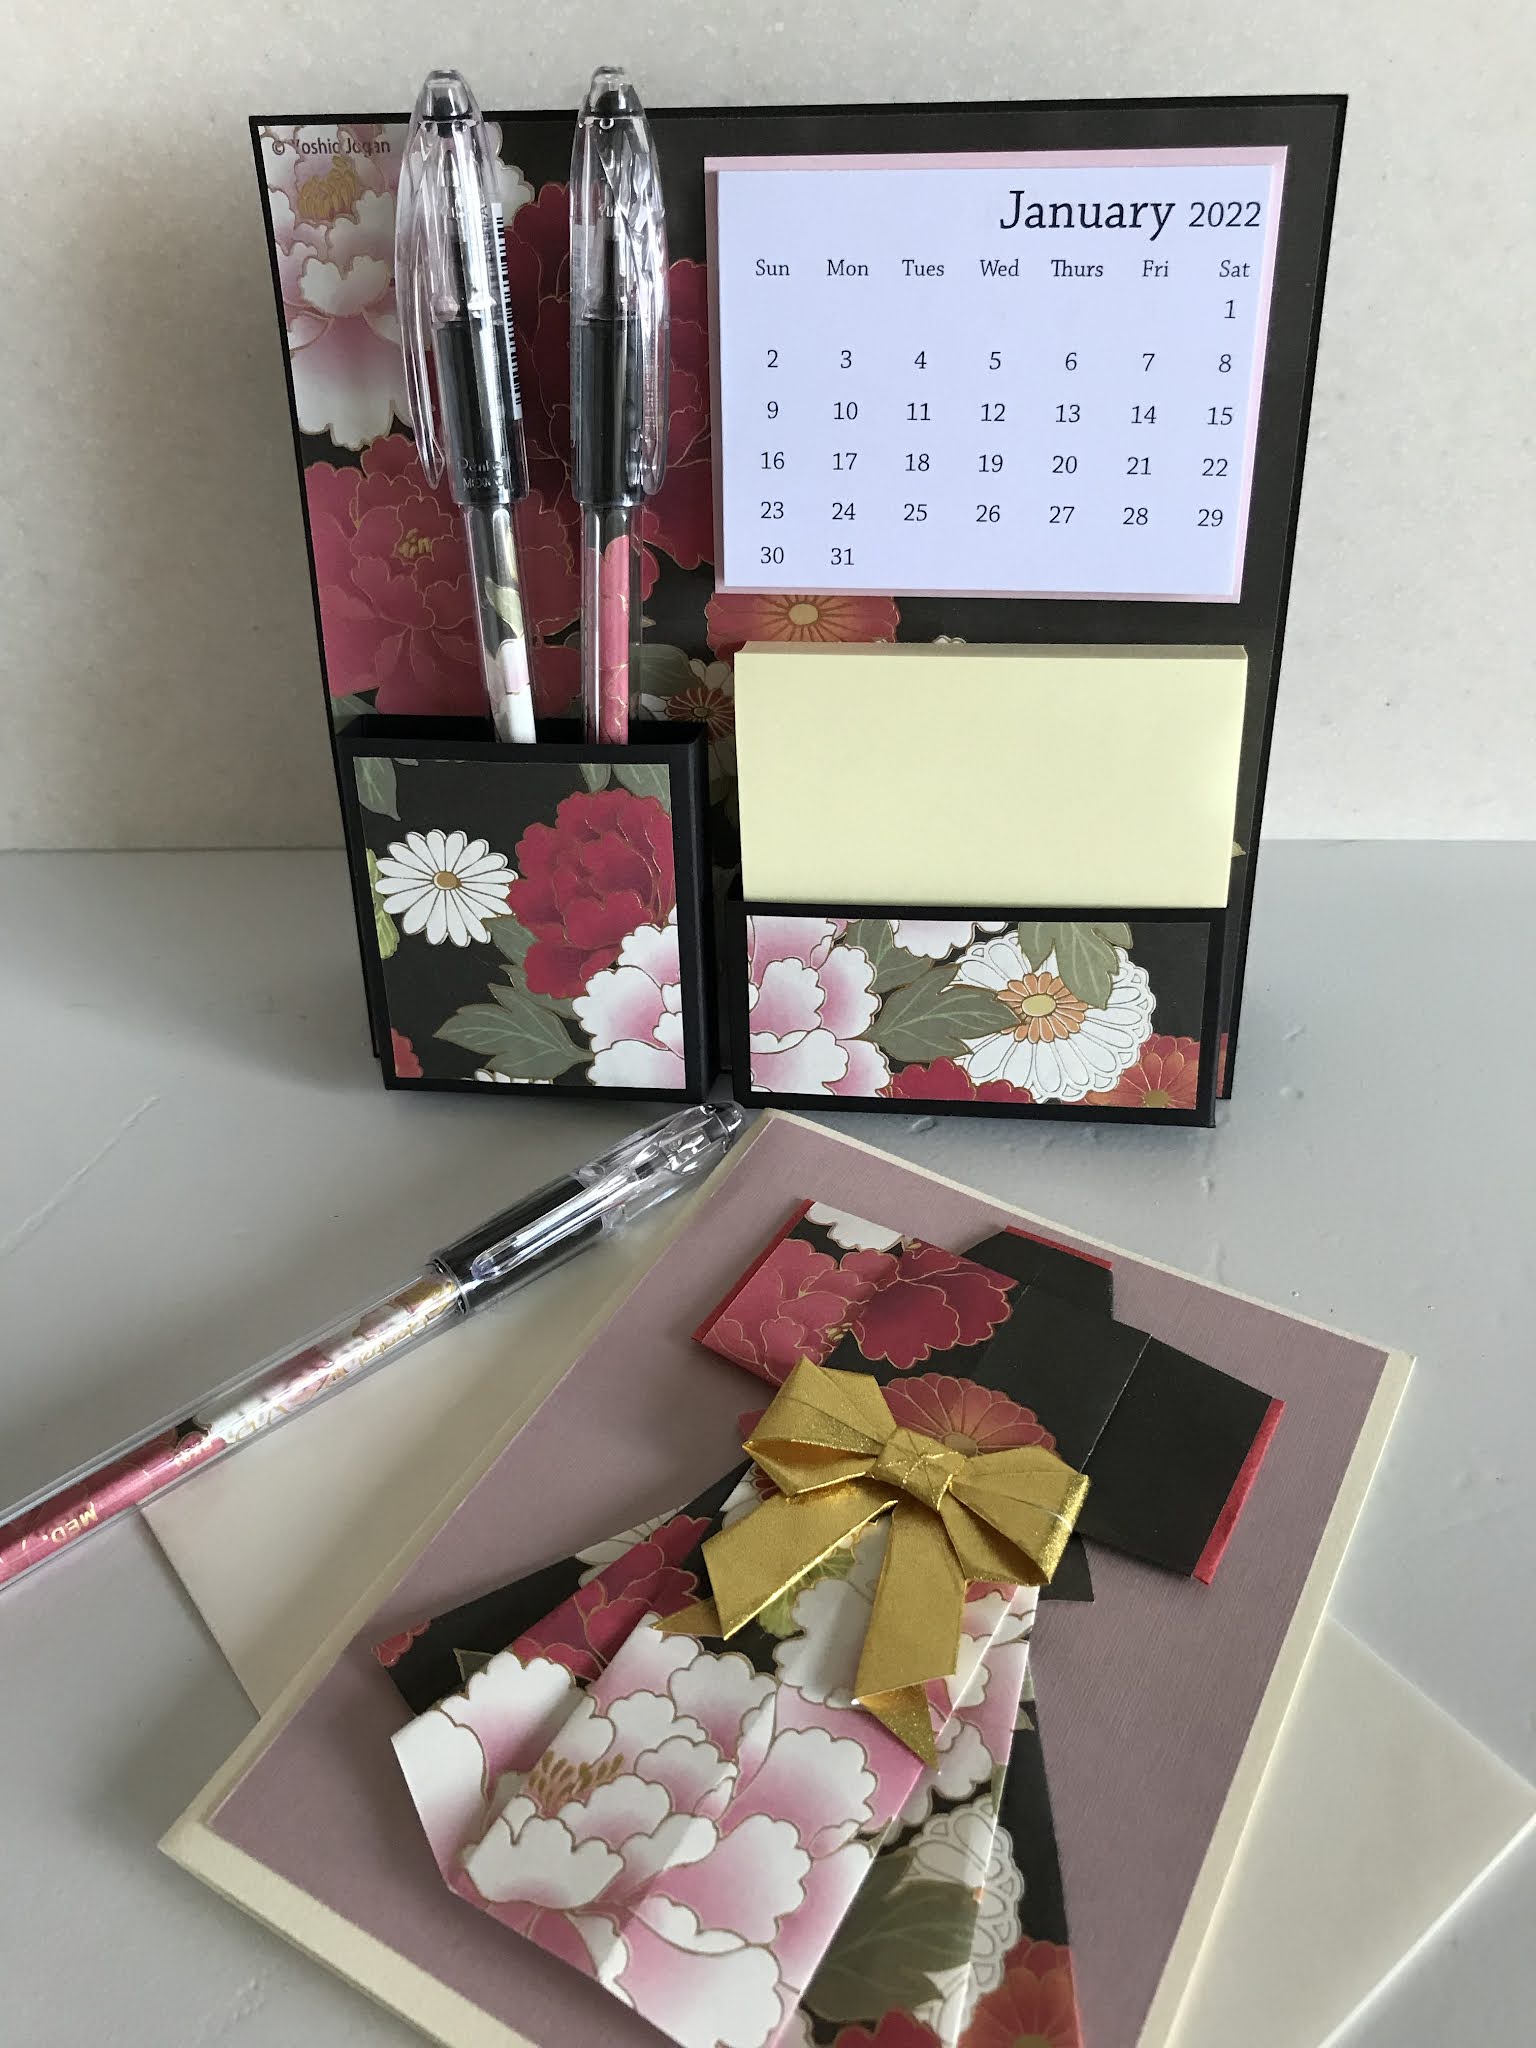
August's theme was "Anything Asian" and here is what I created for my partner, Gail. I taught how to create the desk organizer in class last month.
Thank you for stopping by!
Thursday, August 26, 2021
Saturday’s Class Project
Thank you to those who have reserved their space. Here is a picture of the completed project.

I look forwarding to seeing you in class!
Friday, April 6, 2018
Retire Mint favor boxes

Happy Friday and have a great weekend!
Tuesday, February 13, 2018
Happy Valentine's Day!
Here's a little omiyage gift to share:

So every time I look at these little mail boxes, with the little tiny notes inside, I think, "You've got Mail!"
Thank you Cassie for allowing me to lift your idea!!

Cassie made these adorable little mailboxes for us last month during class. They were so adorable and pretty easy to recreate so I decided to make them as thank you gifts.


Inside I placed two Almond Roca Candy with Macademia Nuts.

The little hula girl stamp is by Rubber Stamp Plantation. I placed it in an envelope and then inside the mailbox.
So every time I look at these little mail boxes, with the little tiny notes inside, I think, "You've got Mail!"
Thank you Cassie for allowing me to lift your idea!!
Friday, August 25, 2017
All Things Washi Class Saturday
Just a reminder of class tomorrow!

Instead of the earrings, at class you can choose to create two magnets. This is the pink kit.
Please go over the supply list of items to bring to class. I'll see you soon!

Here's the last project for Saturday's class. I thought we would create something different with our Washi paper. This is the blue kit.


Instead of the earrings, at class you can choose to create two magnets. This is the pink kit.
Please go over the supply list of items to bring to class. I'll see you soon!
Sunday, February 26, 2017
Paper Trey Ink - Don't forget to Write
Thank you to those ladies that came to class yesterday. It was a fun class!
I was one of those lucky people that was able to pick up Papertrey Ink's Don't Forget to Write stamp and dies. I loved it as soon as I saw it! Although I didn't pick up the whole kit, I was able to pick up the stamp and a die. With that stamp set, I created these thank you gift sets:

Included in each packet is is a writing pad and a thank you card.

I usually write my thank you message on a post it note and apply it over where you would normally write the message. That way the recipient can re-use the thank you card for someone else.
Here's a picture of the thank you card sitting up. I just love, ABSOLUTELY LOVE this stamp set!!

I was one of those lucky people that was able to pick up Papertrey Ink's Don't Forget to Write stamp and dies. I loved it as soon as I saw it! Although I didn't pick up the whole kit, I was able to pick up the stamp and a die. With that stamp set, I created these thank you gift sets:

Included in each packet is is a writing pad and a thank you card.


Monday, June 27, 2016
Just because . .
Here's a quicky favor to make. I don't think I have posted this one:

I just wanted to created something simple and sweet:

Filled with chocolate candy


I just wanted to created something simple and sweet:

Filled with chocolate candy

Sunday, May 8, 2016
Happy Mother's Day!!
It's Mother's Day and today I'm going to tea with my mom, aunt, sister and niece!


Can't have a tea party without little gifts! I decided to make them purple since it is my mom and sister's favorite color.

The little hats I had seen on Pinterest a couple of times. They are made using the 1 oz and 2 oz Portion cups which are on sale at Ben Franklin Crafts this week! I filled the cups with crispy M&Ms.

The little clutch bags are popup gift cards which I created at the spur of the moment. The green bow and label were placed on clear bags which I cut the sides off and adhered it to fit around the bag. For my niece, I put two Hello Kitty Magnets where normally a gift card will be placed.

For my aunt and sister, I added some postage which I know they will always use. Mom got something else in hers.
Happy Mother's Day! Celebrate YOU!!
Thursday, April 21, 2016
Card Candy
Here's a card candy I created as a make-in-take for our scrapbooking club several months ago.

Card candy are basically handmade elements packaged just like in the store. The recipient now has embellishments to quickly create a card.

This card candy also comes with 2 tags and 2 3x3 cards with twine.
**As a reminder, there will be no class on April 30. Instead, I'm cleaning out and gathering stuffs I don't need and will be selling them at a garage sale. At the same time, I'm finding that my mojo is coming back! Must be because I'm getting rid of the clutter ;o) Have a great creative one and thank you for stopping by!

Card candy are basically handmade elements packaged just like in the store. The recipient now has embellishments to quickly create a card.

This card candy also comes with 2 tags and 2 3x3 cards with twine.
**As a reminder, there will be no class on April 30. Instead, I'm cleaning out and gathering stuffs I don't need and will be selling them at a garage sale. At the same time, I'm finding that my mojo is coming back! Must be because I'm getting rid of the clutter ;o) Have a great creative one and thank you for stopping by!
Sunday, March 20, 2016
Honu straw bag class
Time sure has been flying by! Here is the sample for this Saturday's class. We will be creating a straw bag with quick matching cards. Many years ago, I taught a similar class. Well, I have expanded the dimensions. This little bag will hold A2 size cards and other goodies.
Cost of the class is $23. It will be held on Saturday, March 26 from 1:30 p.m. To 4:30 p.m. In Kailua.
 Please bring the following supplies to class:
Paper trimmer, scissors, pencil, scoring tool (I.e. Scor-pal), corner rounder, adhesive (liquid and tape), dimensional tape. If you wish to bring your own ink pads and daubers, we will be using a dark blue ink and soft orange ink pads.
Please RSVP your space to myself or to Bill. I will only be making enough kits. Hope to see you there!!
Cost of the class is $23. It will be held on Saturday, March 26 from 1:30 p.m. To 4:30 p.m. In Kailua.

Paper trimmer, scissors, pencil, scoring tool (I.e. Scor-pal), corner rounder, adhesive (liquid and tape), dimensional tape. If you wish to bring your own ink pads and daubers, we will be using a dark blue ink and soft orange ink pads.
Please RSVP your space to myself or to Bill. I will only be making enough kits. Hope to see you there!!
Monday, January 4, 2016
Family Portraits
This Christmas I created a couple family portrait gifts and thought I would share them with you:


I actually rearranged the little ones on the "A" and "S" but couldn't find an updated photo.

Another Ningyogami family portrait
As gifts, they were relatively inexpensive. The frames were all under $10, but it is the time to create them that is the great gift of all, I think. Thank you for visiting!!
Thursday, December 24, 2015
Dress up
Here's an idea for you. Dressing up a bottle of Balsamic Vinegar or any bottle of liquor:

I cut the red "jacket" just long enough to cover the label of the bottle.
 I think he came out very cute. Don't cha think?

I cut the red "jacket" just long enough to cover the label of the bottle.

Tuesday, December 15, 2015
Tea party - Another Explosion Box?
I'm back! Hi, everyone! This past weekend was the last of the craft fairs this season. Today I just finished putting everything away and now I can start some serious holiday shopping. I can't believe I only have 10 days to purchase and wrap everything. My poor relatives on the mainland always wait patiently for their gifts.
Well, it seems I haven't posted for over a month! I recently got a new iPad and having a hard time maneuvering around. For years I had the first generation but as the updates kept coming, the iPad got slower and slower and I had to do things to get around. Now, I have to catch up. Everything looks so different!
On to the project: As I was putting things away, I found some items from a tea party at the Halekulani that I had several months ago with my favorite tea gals.
At first, it looks like a present . . . Probably an explosion box, you say . . .

You are correct, it is an explosion box but with a twist. Each of the four sides holds a tea bag.

Here's another photo. Instead of folding over the flaps in a typical explosion box, the corner squares are cut in a diagonal and folded over to make pockets.

The box cover measures 7x7, with 1" scoring.
Dori, a belated thank you for a terrific gift!
~~~~~~~
If you didn't know by now, Classes are on break for the holidays. Classes will resume again in January. Tea swap and pocket letter swaps will also start up again in January. In addition, there will be several changes to the blog in a couple of weeks so I sure hope you hang around! Thanks!
Well, it seems I haven't posted for over a month! I recently got a new iPad and having a hard time maneuvering around. For years I had the first generation but as the updates kept coming, the iPad got slower and slower and I had to do things to get around. Now, I have to catch up. Everything looks so different!
On to the project: As I was putting things away, I found some items from a tea party at the Halekulani that I had several months ago with my favorite tea gals.
At first, it looks like a present . . . Probably an explosion box, you say . . .

You are correct, it is an explosion box but with a twist. Each of the four sides holds a tea bag.

Here's another photo. Instead of folding over the flaps in a typical explosion box, the corner squares are cut in a diagonal and folded over to make pockets.

The box cover measures 7x7, with 1" scoring.
Dori, a belated thank you for a terrific gift!
~~~~~~~
If you didn't know by now, Classes are on break for the holidays. Classes will resume again in January. Tea swap and pocket letter swaps will also start up again in January. In addition, there will be several changes to the blog in a couple of weeks so I sure hope you hang around! Thanks!
Sunday, September 20, 2015
Bottle Cap Craft


Happy crafting!!!
Monday, June 29, 2015
It's all about the presentation . . .

I meant to add this photo to yesterday's post but it had already gone out. This is the flower tape dispenser all wrapped up. There are a couple of things I wanted to mention:
The wrapping paper, I just LOVE it! Found it at Ross. 40 Square Feet of 100% recycled Kraft wrapping paper for just $2.99! I also found one that had pink bicycles on it. The price was just too good to pass up.
Secondly, this is for the gal that loves owls. I found an owl key chain to add to my gift.
A long time ago as we were making altered paint cans, our leader and teacher that day said that any gift can look fabulous (so true), "It's all about the presentation."
Sunday, June 28, 2015
Another Tape Dispenser Gift


She likes owls so here is her birthday card. I believe the image is from AI.


Oh, and I saw this Scotch Brand Flower tape dispenser at Fisher the other week. Like the Shoe Tape Dispenser I altered earlier, this one needed some "small kine touch up", but not as much blings....

Wow, that was quick and fun. I've off to creating something else . . . . Have a Great Week!
Sunday, June 14, 2015
Crafty Goodness
A week ago I took my son to Lego Land. It was his first time. If you have gone there, you will see employees wearing name tags similar to this:
 My son wanted one. Apparently the company provides the name tags for the employees; they don't sell them. "Sherry" graciously offered tips for me to create one just like it.

This was quick! My son created the badge platform and I just finished it up. Now the last thing for me to do is to purchase a clear tape for my label maker, print out his name, and add it his badge.

Here's the back of his tag. I put too much hot glue but at least the pin won't come off!!


 Have a great week!


This was quick! My son created the badge platform and I just finished it up. Now the last thing for me to do is to purchase a clear tape for my label maker, print out his name, and add it his badge.

Here's the back of his tag. I put too much hot glue but at least the pin won't come off!!
~ . ~ . ~ . ~
Here's another project I created this weekend. Needed to create a quick birthday gift for a friend.

Here is the gift. Do you see any possibilities???
The tape dispenser is made by Scotch brand and I picked it up at Fisher.
First, let's add some bling and then I think it needs a little bow:


Wednesday, May 13, 2015
Happy Mother's Day!!
This post was supposed to have been sent on Mother's Day 2015.
I hope all you mothers had a beautiful day celebrating you!
~ ~ ~ ~ ~
Flower Pens. I know it's been around for a long time but I thought I'd share. Mahalo to Phoebe at Ben Franklin in Kailua who reminded me just how quick and easy this pretty gift is, perfect for my mother-in-law:


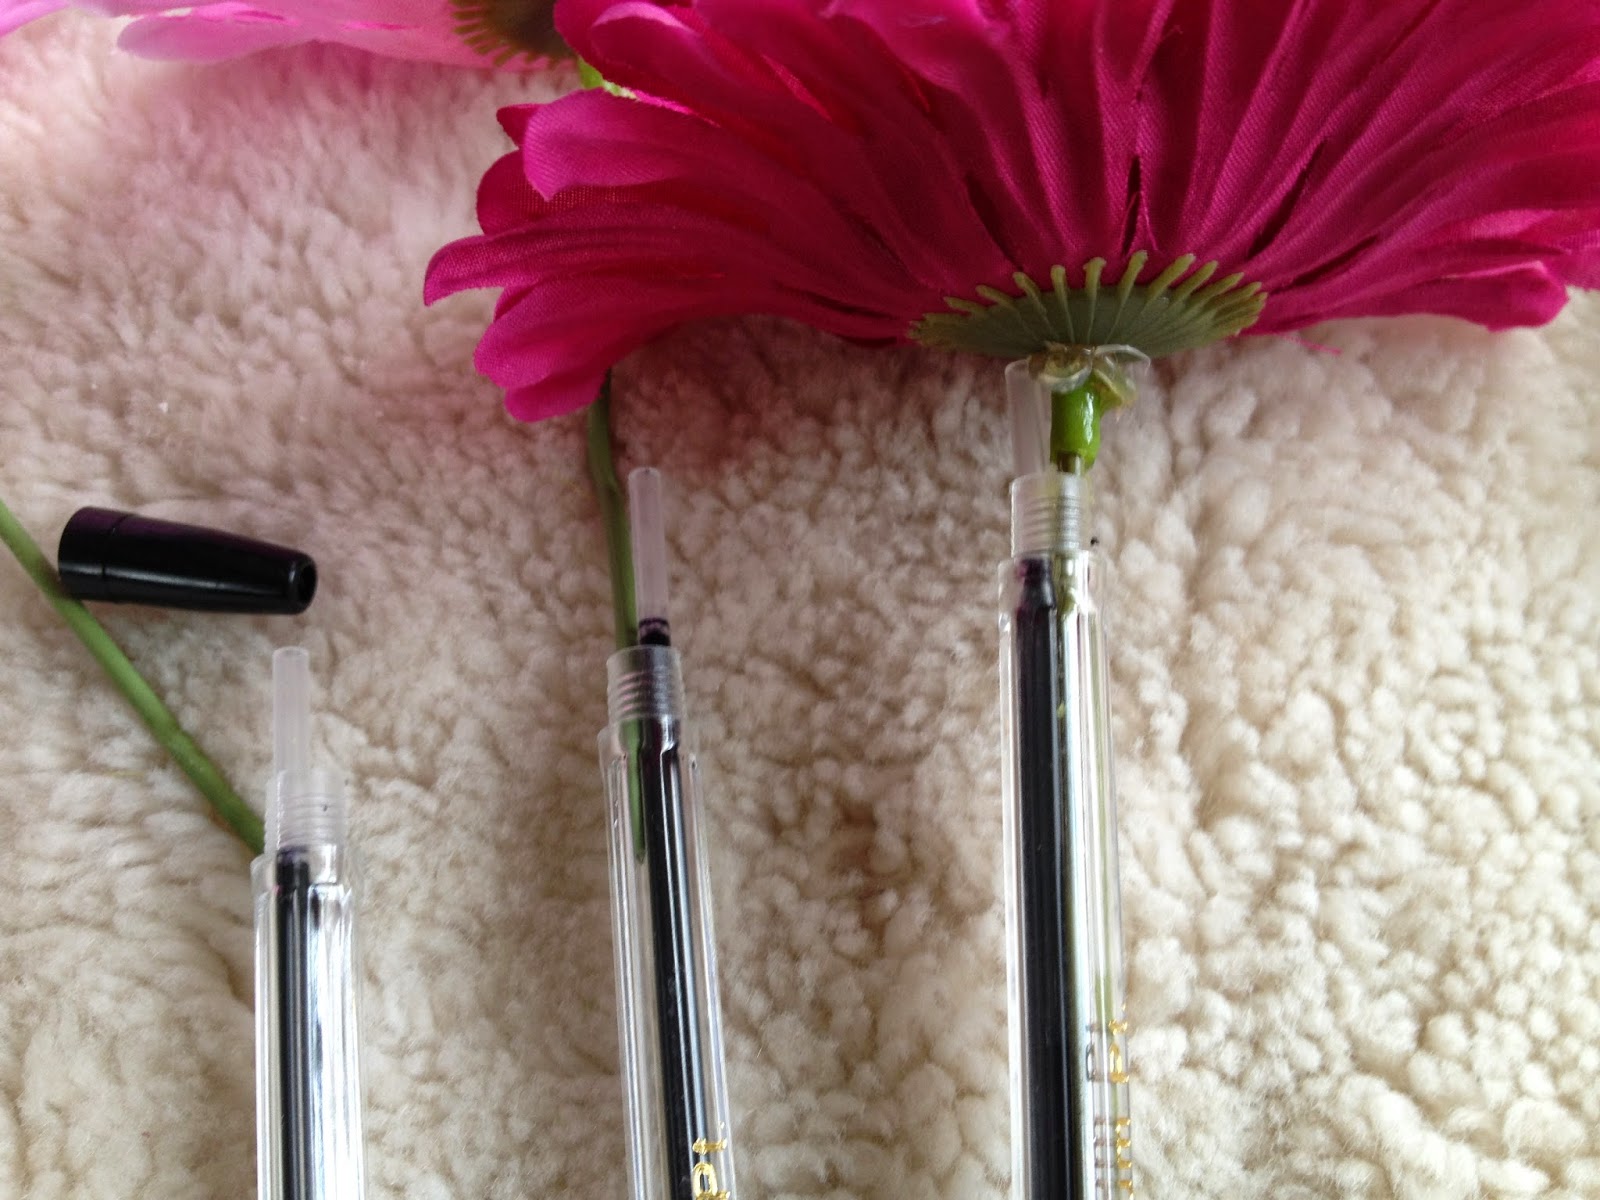


Unbeknownst to me, my son presented this beautiful gift to me for Mother's Day!!!

And yes, it is flower pen!! LOL!!

Subscribe to:
Posts (Atom)