For Sale

Monday, May 28, 2012

Ningyogami - little 3x3 cards

 I have FINALLY finished all the Ningyogami kits that were ordered.  

A BIG Thank you to everyone who took the classes and those that ordered kits!!!!!  

 These are little 3x3 cards that were created from leftovers.

I have a couple of ideas for more dolls but I'll save them for another day.

Hope you are having a great Memorial Day weekend!  
I am!!  
For the past couple of weeks I've had lots going on.  
so it's so nice to just relax, clean house and create at leisure!
Have a great one!

Sunday, May 27, 2012

Mini Album Class - Meander Accordion Album

Let's create Meander Accordion albums!  

 These little albums are so addictive, you'll soon find yourself creating lots of them!  
They are fun, fast, and easy

We will create these two albums shown and
you can bring your own supplies to decorate it further (can you say "BLING!")


Class is scheduled for Wednesday, June 13 from 6:30p to 8:30p at a Place in Time, Kailua. 
Cost is $20.  Please bring the following supplies to class:  12" Scor-Pal or other scoring tool, bone folder, 12" paper trimmer, scissors, adhesive of your choice, black liquid pearl, brown ink pad with sponge or other applicator, bling (if you want), and anything else you wish to make these albums your own style.

Thursday, May 24, 2012

Tea Swap NE-1?

Karen from Canada was my partner for May's Tea Swap.  It was so cool to have a partner living so far away!!  Check out her blog!  The theme was flowers and the challenge color combo was red/green.  This is the beautiful card she created for me along with two Teaforte Blueberry Merlot and Cherry Cosmo.  Mmmmmm!!  She also included a flowering tea bud, this one is called Starlight Rose.  I recently acquired a clear tea pot so I can't wait to see what forms!!

This is the inside of the card.  Love the quote! 
Karen, thank you for being a great partner this month and for a great card and delicious tea!!

Here's my card to Karen.  She is called Clementine the Tea Pot Girl from Stamping Bella.  I used a couple of copics and Prima flowers.  The quote was passed on to me by DeAnna.  (Thank you, girlfriend!  I've finally used it!).  The quote goes perfectly with the image.

I also reused a cute goodie holder that Kelli made at our last get-together.  I thought it went perfectly with the card.  The owl is from Cricut.

Inside the holder I included 3 teas and 2 Green Tea candy.


Wanna join in on the fun???

It's now Open call for June's Tea Swap!!
Requirements: 2 tea bags in a handmade card mailed to your partner by June 8.

Optional Card Theme:  Masculine cards
Optional Colors: Brown/Black/Beige 

Card can be blank OR you can write a note in it. Your choice!

If you are interested, email me no later than May 25 midnight
Send me an email SUBJECT: TEA SWAP with
your name
mailing address
email address
likes/dislikes/allergies (re tea type)
Loose tea okay? Y/N
blog (if any)
If you are willing to swap international or US ONLY

I will send a group email with the partner list by May 28. Teas must be mailed out by June 8.

Drop me a line today if you are interested!

Responsible swappers only, PLEASE!

Tuesday, May 22, 2012

Sneak Peek #5: Year of Cards - Gift Cards


Here is the last sneak peek for Wednesday's class. 

Open the card and it's a pull up present.

Have a great day and thank you for stopping by!

Monday, May 21, 2012

Sneak Peek #4 - Year of Cards: Gift Cards


I'm falling in love with Basic Grey's Little Black Dress paper line.  It is so rich and elegant!  Here are the supplies to bring to class: Glue and tape adhesive, paper trimmer, scissors, Scorpal or scoring blade, bone folder, Crop-a-dile, Tweezers, Tim Holtz Walnut Stain or other dark brown ink pad; Tim Holtz Ink Applicator or sponge,  Opt:  Xyron Sticker maker ("X").  I forgot to add:  Liquid Pearls in colors:  Silver and bisque or buttercup

Sunday, May 20, 2012

Sneek Peak #3 - Year of Cards: Gift Cards

 This is Sneak Peek #3.  It is a pop up gift card holder. 
We will be using a Medallian Folding Technique on this card.

Isn't this a beautiful elegant line!  This class will be on Wednesday, May 23.  
Hope to see you there!

Saturday, May 19, 2012

Sneak Peek #2 - Year of Cards: Gift cards

 Year of Cards continues with gift cards.
We'll be playing with Basic Grey's Little Black Dress line.
Class is on Wednesday, May 23 from 6:30p to 8:30p at A Place in Time, Kailua.
(Class is sold out!)

Please bring the following items to class:
Glue and tape adhesive, paper trimmer, scissors, Scorpal or scoring blade, bone folder, Crop-a-dile, Tweezers, Tim Holtz Walnut Stain or other dark brown ink pad; Tim Holtz Ink Applicator or sponge, Opt:  Xyron Sticker maker ("X")

Tuesday, May 15, 2012

Sneak Peek: Year of Cards - Gift Cards #1

The next Year of Cards Class is gift cards scheduled for May 23, from 6:30p to 8:30p at A Place in Time, Kailua.  Cost is $20.
 Here's the first sneak peak for next week's Gift Card Class.  The card lies flat in an A-2 envelope.  When taken out, it pops up like this.
 
I just noticed that I put the word "Celebrate" when it is supposed to be "Congrats".  So that would be the only difference in the card that you make in class.

Supplies needed for class will be indicated later.

Monday, May 14, 2012

Mother's Day Gifts

I started these gifts early this morning and I was stressed all day trying to finished them before our Mother's Day Dinner while running errands here and there.
   I created a bunch of my Ningyogami dolls in different heights and created a framed family plaque.

 
 These frames are from Ross' for less than $10.

BTW, I did finish them 1/2 an hour before we left for dinner.

Now to work on the cards for my gift cards class!!!

Sunday, May 13, 2012

It's Mother's Day

Wow, it's been a week since I last posted.  Life has been busy.  I had a couple of orders for the cupcake box as well as some personal issues I have had to deal with.  Other than that, today's Mother's Day.

Here's a shout out:  
Happy Mother's Day to all you beautiful and creative moms!!!

For me, it's just another day taking care of everyone else :o)  But that's okay.  I am loved :o)

Here's the sliding card I created for my mother-in-law.  It was one of the projects we did at the NSD event last weekend.

  Priscilla, the owner of A Place in Time, is the designer of this beautiful card:
It's a sliding card.  Pull out the tab, and more words appear in the little circle as well as the finishing of the poem.

Tomorrow I'll post the gift I created for my mom and mother-in-law.

Saturday, May 5, 2012

Friendship with flourish

 Here's a simple card I created for a friend.  The stamp is a set from Stampin Up called Previous Butterflies.

The butterflies are Martha Stewart Punch.  I organized an NSD crop event event at a Place In Time.  I'm exhausted!   I think I created 2 Make-In-Takes and possible, if I get up early in the morning, another one.  :o) 

Thursday, May 3, 2012

Cupcake Holder Tutorial

Per your request, here is the tutorial: 
 You will need 3 papers:  a)  12x12 paper for the box bottom; b) 8 x 8 paper for the box top; and c) 5 3/4" x 5 3/4" for the cupcaker holder (the inside).
Creating the box bottom:  Score the 12x12 paper at 4" and 8"; Turn the paper 90 degrees and score at the 4" and 8".  Trim your paper as follows:

Following the design above, dashes mean score; solid lines mean cut

 
At one loose fold, punch out a portion of the label punch (I used SU Decorative Label Punch) and adhere the folder over to create a pocket.  Each loose folder gets adhered to the next flap so that you are left with a cross and each outside portion of the cross has 2 pieces of cardstock adhered to each other.

Here's another picture showing you how the folds are overlapped.

Now to create the Cover and the Inside cupcake holder.  Cut paper to size indicated above.

For the Cover, score 2" all around the 8"x8" paper and then cut at the four corners.  You will be creating 4 cuts altogether (see picture above). 

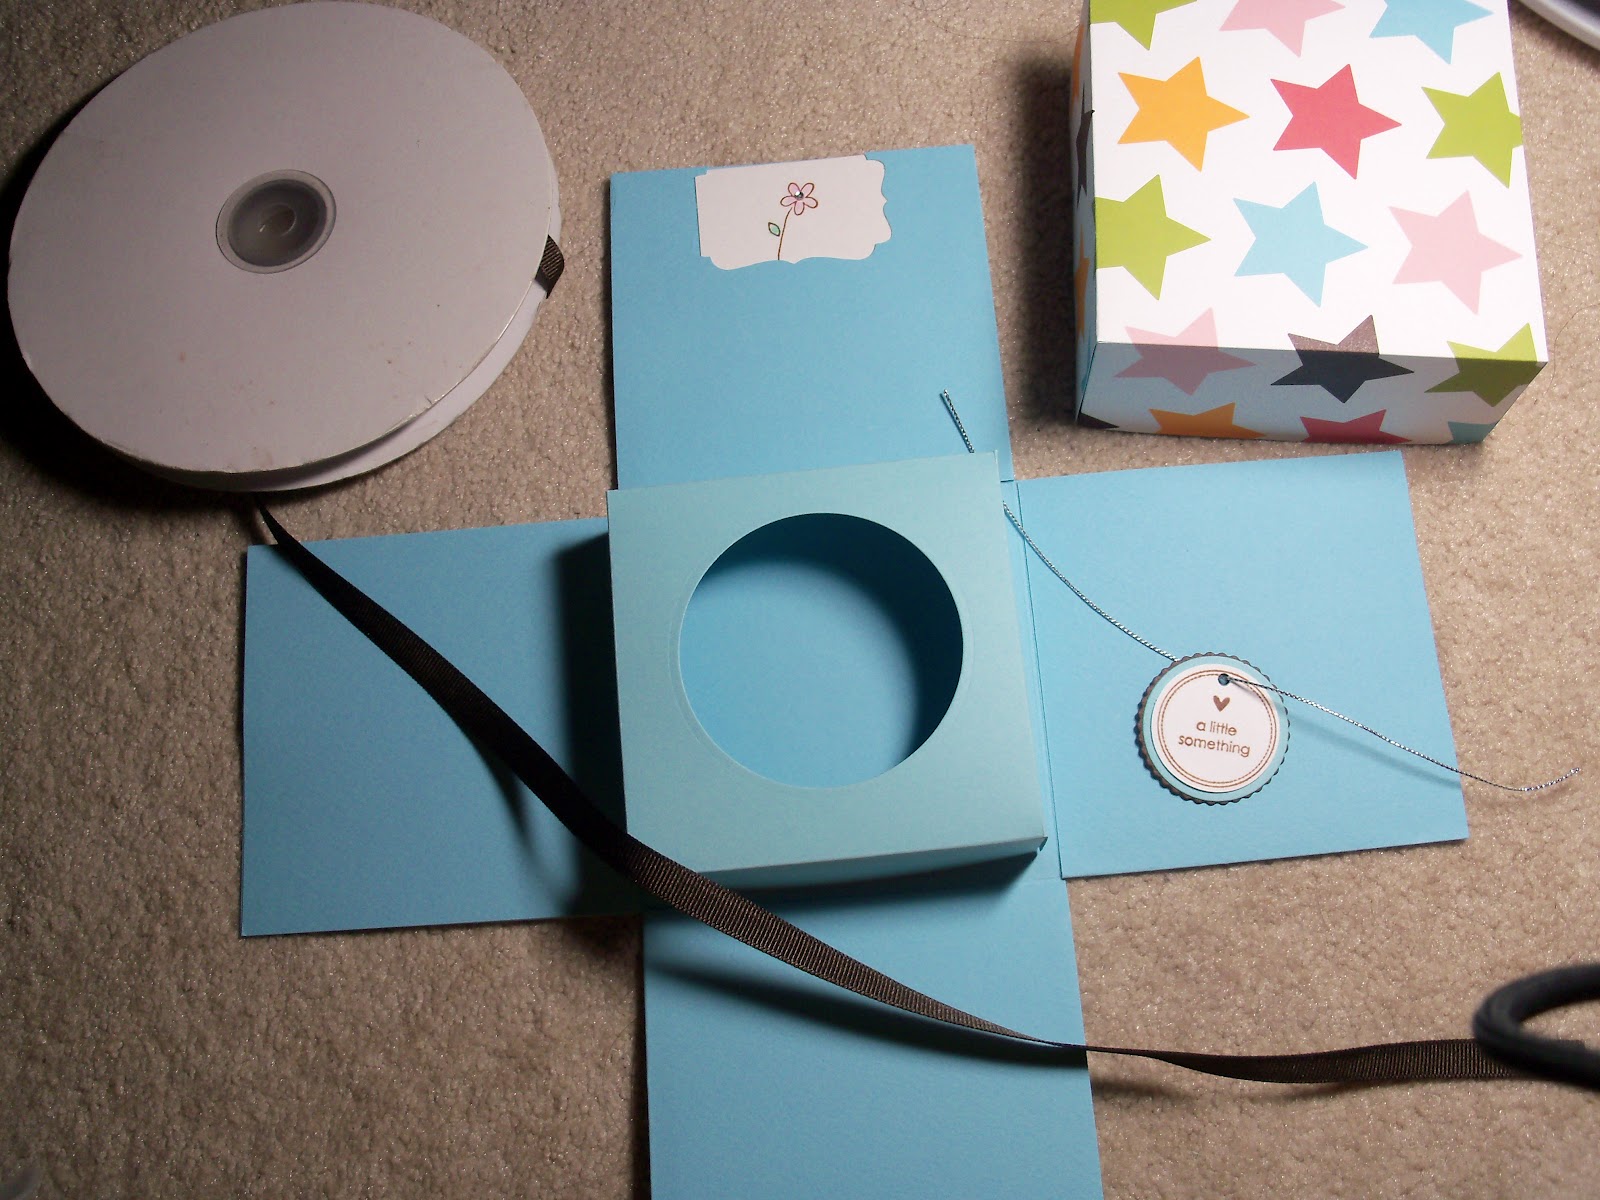
For the inside cupcake holder, score 1" all around the 5 3/4" paper and then cut at the four corners. Then using a die cut machine or punch, cut a 2" centered circle (I used a Nesti).
Finish off the box by adhering the four corners. 
Here is what the box cover and the cupcake holder looks like right side up.

Create your little card.  I used an SU stamp from For A Friend set, chalk and bling. 
Place the card inside the pocket created by the SU Decorative Label Punch. Place your cupcake holder inside the box.
Fold up the four flaps and place your cover on top of the box.
Tie a ribbon over the box and a pretty tag.  (SU tag from the Matchbox messages set.)
Now all you need is the cupcake. 
Thank you for stopping by!

Tuesday, May 1, 2012

A little something for the teacher

Teacher Appreciation Week is this week at the boys' school. 

Here's the gift box in pretty pink and brown

With a cute little tag

Untie the ribbon, lift the lid.  Ta-da, it's a cupcake holder!

This cupcake holder is a take off from the explosion box that Brenda made for me here.
I knew the teachers are not familiar with "designer cupcakes" and would appreciate them.
The designer cupcakes are from Cake Couture in downtown Honolulu.
Flavors change daily.  I bought a variety:  Red Velvet, cookies and cream, chocolate, Oreo cookie, lemon, and vanilla.  Mmmmm!!