

Sunday, September 22, 2013
Saturday, September 21, 2013
I Dig Dinosaurs - A Mini-Album Class
I Dig Dinosaurs Mini-Album Class
Saturday, September 28
1:30p to 3:30p
A Place in Time
1079 Liku Street
Cost $28.00
All ready for class and here's the sneak peak:

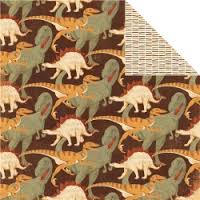
Paper line is Paper Loft Funkysaurus.

This paper-packed mini album has a base of 4 pages and can hold 19 photos, 4 wallets and 5 smaller photos (on its 5 tag mini brag booklet). You also will create 3 mini books that fit nicely inside the main album

Actually, as I look at it, it may take you longer than two hours to finish it but you can easily finish it up at home.
Please bring the following supplies to class: Paper trimmer, Scor-Pal or other scoring device which allows scoring in 1/4 increments; scissors, pencil or pen, Eyelet setter of your choice, 3-Dimensional tape, corner rounder, both tape and glue adhesive
I have a couple spots available so please RSVP right away if you wish to join us.
Have a great weekend!!
Wednesday, September 18, 2013
Funkysaurus - Mini Album Class
Just a quick note to let you know of the upcoming mini album class scheduled for Saturday September 28 from 1:30p to 3:30 p.m. I am still working on the album but wanted you to know that we will be using the Funkysaurus line by Paper Loft:

Thank you VERY much!!

More specifically, this dinosaur line.
Class is $28 at A Place in Time.
For those that have already signed up,
I am sorry but I will be contacting some of you to make sure you will be there.
I'll post the completed album the end of this week so please stay tuned.
Thank you VERY much!!
Tuesday, September 17, 2013
Bazzill swap
I love to join the Bazzill card swaps (http://swaps.bazzillbasics.com/) About every 6-8 weeks, they pick a new Bazzill paper line and have a swap. You make ten cards using the selected Bazzill paper. You are free to use any type of embellishment (Bazzill or not) and chose any style of card. Some swaps, there is a theme (like Thank You, Birthday) and some swaps, no theme is selected. You mail your 10 bagged cards to Bazzill, they swap them out and send you 10 in return (one will be your own). Fun! I can't post my card on any blog prior to the swap, so that's why I've waited until now to post.
 Enjoy! Karen

Sunday, September 15, 2013
Backpack - the tutorial

Here's the backpack tutorial! Again, the original idea is from Mary Arima at Splitcoast Stampers. She deserves all the credit!! :o) I used the BigZ Scallop Envelope and the Box 3 dies to quickly create my backpack.


Cut off the bottom of the Scallop Envelope die cut, with the scallop flaps folded and adhered towards the inside, adhere the box together.

This is a picture of the flaps adhered inwards.

This is the third diecut from the Scallop Envelope die. Score 1/2" from the scoreline towards the flap. Cut off the two side wings. We will call this the lid.

This is the back of the box we previously made with 2 pieces of the Scallop Envelope die. The lid is adhered on the back of the box.

A picture of the front of the box where I am just adhering the lid.

The finished box with lid. I sealed my box lid with velcro.
Now onto the large main portion of the backpack:
Now onto the large main portion of the backpack:

The purple paper is my pattern for the lid.
Get your pattern here. Deselect resizing option!!!

I have attached the box sides together and adhered one side of the bottom of the box. I also adhered the lid to the top. 6 holes were punched to which I will set eyelets: 4 on the lid and 2 at the corners on the bottom back.

Another picture of the backpack adhered before the lid was put on.
The middle of the ribbon (24 inches) sticks out from the two eyelets closest to the scallop part of the lid.


.JPG)

Now all you have to do is to decorate the bag and place velco dots.

Happy Creating!
Saturday, September 14, 2013
Greeting Farms - Annika

Remember the copic class I took last month? We received lots of images to practice our coloring and this pretty little school girl was one of them. I think her name is Annika from Greeting Farm. I'm feeling much better about my coloring. This thank you card is for my son's teacher with a matching backpack of goodies.
Backpack tutorial is forth coming . . . . stay tuned!!
Friday, September 13, 2013
LO Share - Risky Business
I am going to miss the theme party photos when my daughter graduates from college next year. I can't believe the time has flown by so fast. The theme for this party was Risky Business -- hence all the button down shirts.

Wednesday, September 11, 2013
Art Impressions - Girlfriends in the Tub
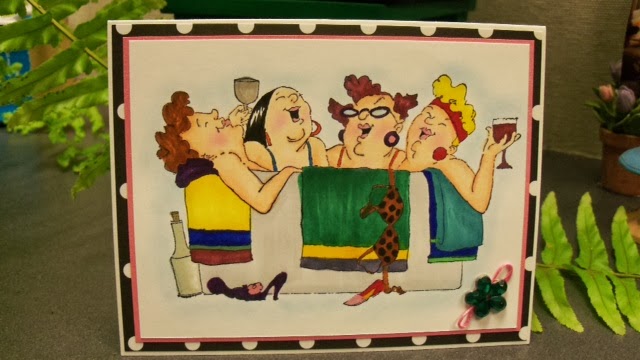
Here's another Girlfriends stamped card. This one is in celebration of a girlfriend's 50th birthday!!
I'm still practicing my Copic coloring. Yuck! Don't look too closely but I should have colored the shoes in a lighter color. Eeuu!! Oh well, better coloring next time!
By the way, I'm working on a tutorial for those little backpacks I made almost a month ago so stay tuned!!
Tuesday, September 10, 2013
Scrap cards
My favorite cards to make at a retreat are scrap cards. I make a layout or two and then use the scraps to make cards. I get a lot of banner cards (as I have a lot of long narrow scraps!). Here are two scrap cards that I made in my May retreat. All products and punch-outs were part of the same line of paper (which I forgot).
 Enjoy! Karen

Friday, September 6, 2013
Butterfly cards
Another local swap - this time we did 3x3 cards. I made my cards using an old paper pad and SU butterfly punch and Nestabilities dies.
![]()
 Enjoy! Karen

Monday, September 2, 2013
Yum Cup
A friend made this for me as a treat for participating in a swap. What an adorable idea! I'm definitely casing this! Coffee cup and lid - unknown. Paper, ribbon and sentiment - SU. Isn't the little handmade flower cute?!
![]()
 Enjoy! Karen

Subscribe to:
Posts (Atom)